

Cockpit on NixOS setup
Introduction
Section titled “ Introduction”Cockpit is a cutting-edge web-based graphical interface for server management. It allows you to administer servers effortlessly and includes a built-in terminal.
Personally, I utilize the NixOS package to monitor system logs, network settings, services, system resources, and CPU load and all without needing to touch the command line.
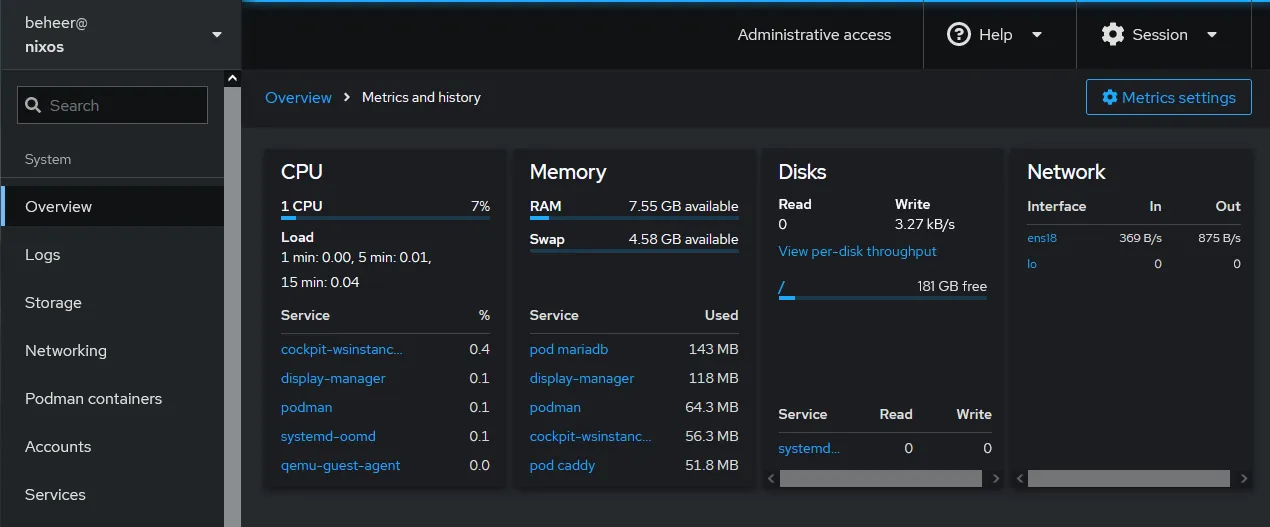
I use also plugins like Cockpit Files, Cockpit Podman and Cockpit Machines. This works out of the box so the following notes are now obsolete: virtual machines and podman containers. For some time now, I have been contemplating replacing my homelab hypervisor with NixOS, and incorporating virtual machines and Podman containers is a crucial part of that transition.
-
Add
libto the top ofconfiguration.nix/etc/nixos/configuration.nix # To edit use your text editor application, for example Nano{ lib, config, pkgs, ... }:In this case I am using the Cockpit package from the default channel. But you can also use a newer version from the unstable channel (if available).
-
Then add the Cockpit settings:
/etc/nixos/configuration.nix # To edit use your text editor application, for example Nanoservices.cockpit = {enable = true;port = 9090;plugins = [pkgs.cockpit-filespkgs.cockpit-podmanpkgs.cockpit-machines];# openFirewall = true; # Please see the comments sectionsettings = {WebService = {# AllowUnencrypted = true; # 2026-08-04: Not needed anymore?Origins = lib.mkForce "http://IP:9090 https://IP:9090";};};};# IMPORTANT: Please read the instructions belowInstructions:
- Optional Replace port number
9090with a port number that is available if needed - Required Replace
IPwithlocalhostor your IP address, this is needed to prevent a failed websocket connection (please see https://github.com/NixOS/nixpkgs/issues/453337)
- Optional Replace port number
-
Switch NixOS configuration
Now you can switch to the new NixOS configuration. Run the following command:
# Open your terminal applicationsudo nix-collect-garbage # Optional: clean upsudo nixos-rebuild switch -
Check the results
Now you can browse to Cockpit by opening a web browser and going to:
http://localhost:9090. Replace localhost with the relevant IP address or FQDN if needed, and adjust the port if you changed it earlier.
No comments found for this note.
Join the discussion for this note on Github. Comments appear on this page instantly.